Posts

Bike Hack: DIY Bike Storage

Guest hack provided by Tony Baldick on his MASHIRA site. Indoor bicycle storage can be tricky, as space is always limited, but with some simple IKEA parts, Baldick was able to create a pretty awesome 3-tier system…

Presenting the 3 tier stacked IKEA storage bicycle rack!  All rack components are from the modular (and very inexpensive) Stolmen series from IKEA.  Using this post for inspiration, I used two telescoping posts, two clothes rails, ten end fixtures, and six hooks.  This, in my mind, made the system more secure and stable for three bikes.  All tools for assembly are included with components.  In a nutshell, use the Ikea instructions for assembly.  Padded strips with adhesive backing placed on the inside of the Stolmen hooks will prevent scratching.
Like :   No drilling is required!  All components are matte white, which will probably look good against any interior.  This being a modular system, you can add or subtract other add-ons from the same model family.  Put some plants on it, or a mirror, maybe a cat bed?  And lastly, 3 stacked bikes!  Who has that?  Watch friends marvel at your mad hacking engineering skills.  Cost : $100 – $120ish.
No Like :  Yea, getting that top bike kinda sucks.  I stand on a chair to grab the highest bike and put said bike back.  Obviously, having the lightest bike on the top helps.
Looks pretty great to us… got more bike hacks? Share them with us, we’d love to show-off your innovation!
Share Your Bike Hacks!

We’re always looking to share useful bike hacks with people, do you have one that you’re proud of? Send it our way and we can share it with the masses (giving you credit for your genius, obviously)!

Email leslie@slobikelane.org for any hacks you want to share.


Bike Hack: DIY Bike Light

When it’s dark outside, riding without a white front light can get you a ticket, but more importantly, it’s super dangerous. Sometimes cars aren’t looking for bicycles on the road, so when you are riding without a light at night, it makes it even harder for them to notice you.

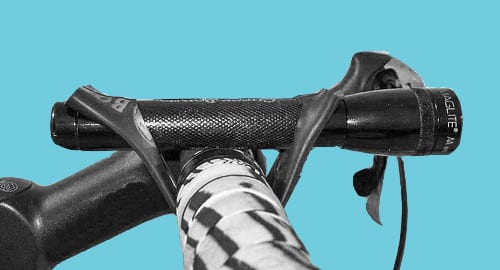
Bike-specific lights aren’t necessary to accomplish this (although they are nice and can be found in the Bike Kitchen) you can use an existing smaller flashlight you might have lying around.

  • Find a smaller flashlight that works and isn’t too large to put on your handlebars (don’t prevent yourself from braking or turning)
  • Using an old intertube, cut two small circles in it, about 3 inches apart
  • Stretch the intertube under your handlebars and place the flashlight in the holes
  • Make sure the flashlight is held on tight and will face forward while riding
Being visible while riding at night is extremely important to avoid collisions with cars, other bicyclists, pedestrians and inanimate objects.

Bike Hack: Bottle Cap Headbadge

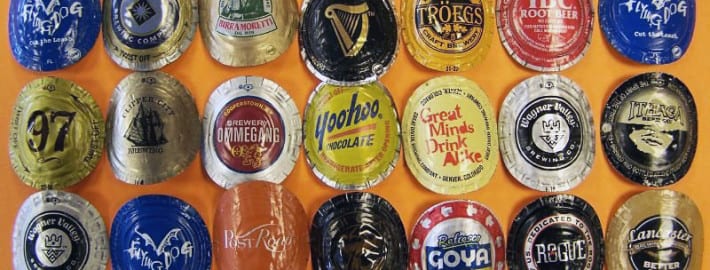
Everyone wants their bike to be unique, having a custom headbadge is an extremely easy way to make this happen! The folks at the Bicycle Escape have a series of bottle cap headbadges to do just that.

Bike Hack: Cork Barends

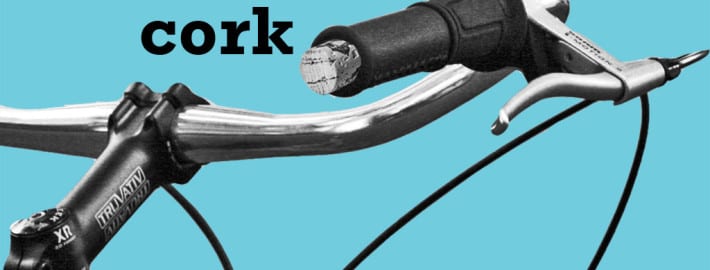
Sometimes bartape doesn’t want to stay on securely the way you want it to. Luckily that cork from your previous bottle of wine can come in handy to provide an easy fix!

  • Wrap the bartape as you normally would, stuffing the end of it into your handlebar
  • Use the cork as a plug to keep the tape in place
Got a bike hack you are proud of? We’d love to share it with the world (and will of course give you credit for your idea!).

Bike Hack: Tube Tie Downs

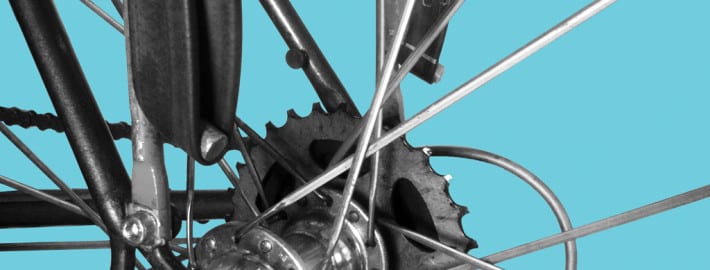
Being able to carry stuff on your bicycle is a great way to make riding a bicycle the best way to get around. Rear racks are really easy to find (try the Bike Kitchen!), inexpensive, and simple to install on your bicycle.

Most of rear racks give you the ability to use a bungee across them in order to strap things onto it, the same can be done to front racks as well.

  • Find a used intertube (they’re generally free and easy to find)
  • Hook it around the rack mount tab on the lower portion of the rack
  • Stretch it across to the other side of the rack
  • That’s it, we told you it was easy!
NOTE: Before you take off to ride, make sure nothing is going to get in the way of your wheels, this could cause you to crash! Check that the intertube is solid and is properly holding down whatever is on the rack.
You can find discarded intertubes at the Bike Kitchen or at most bike shops.